Outlook Signature Setup
Set up an email signature in Outlook to add your personal touch to your emails. Go to File > Options > Mail > Signatures.

Written by Saloni Vyas | Published on Jun 13, 2023 | 12:20 AM IST | 5K
Outlook Signature Setup
An Outlook signature is a piece of data that is automatically attached to the end of your outgoing emails. It can be your name, title, organisation, contact details, and other pertinent information. Outlook signatures give emails a professional touch and promote your business. It is a simple way to improve the look and professionalism of your emails. If you are not already using an Outlook signature, here are some ways to set up the outlook signature.
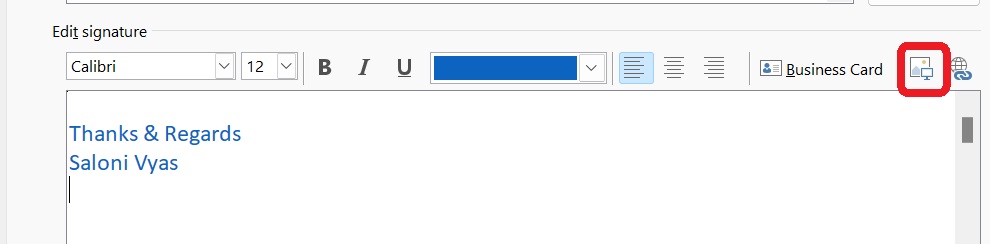
You can add a picture to your signature to add quality and information to it. Pictures may include your company’s name or your brand logo. Here are the steps to add a picture to your Outlook signature:
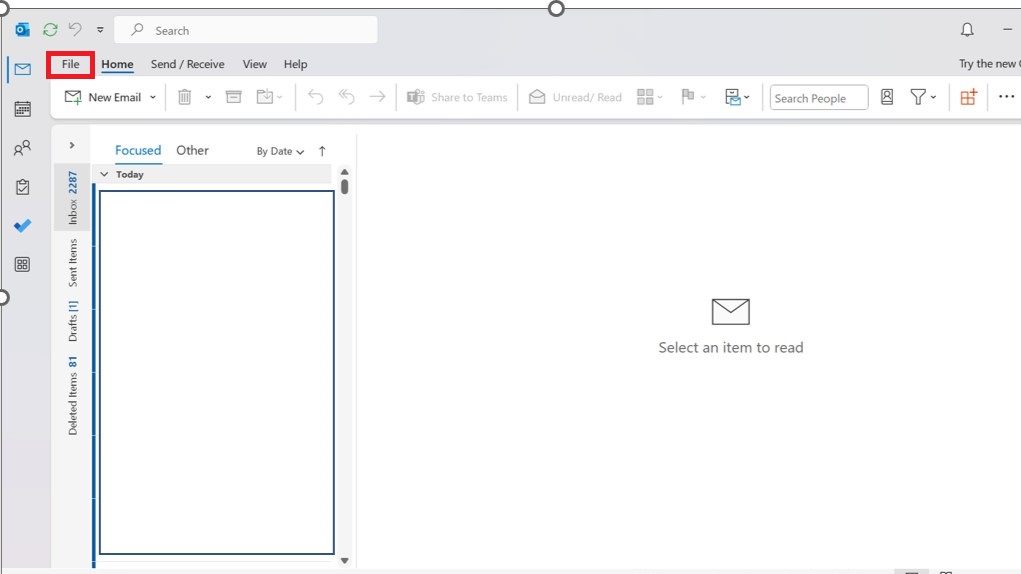
1. Open Outlook and click on the File tab.
2. In the left pane, click on Options.
3. In the Outlook Options dialog box, click on Mail in the left pane.
4. In the Mail Format section, click on Signatures.
5. In the Signatures and Stationery dialog box, select the signature that you want to add the picture to.
6. Click on the Image button.
7. In the Insert Picture dialog box, browse to the location of the picture that you want to add.
8. Select the picture and click on Insert.
9. The picture will be added to your signature.
10. You can resize the picture by dragging the corners of the image.
11. When you are finished, click on OK.
12. Click on OK to close the Signatures and Stationery dialog box.
How to create an email signature in Outlook on the webIf you do not have an Outlook app, then you can also create email signatures in Outlook on the web browser. To create an email signature in Outlook on the web, follow these steps:
1. Open the web browser and go to Outlook website (https://outlook.live.com/owa/) and sign in to your account.
2. Click on the Settings (gear-like) icon in the top right corner of the page.
3. Select View all Outlook settings from the Settings drop-down menu.
4. Select the Mail section at the left-side of the pane.
5. Then, select Compose and reply from the list.
6. Under Email signature, click on New signature.
7. In the New Signature dialog box, type your Name for signature and click on OK.
8. You can add more details like your contact number, designation, etc to your signature in the Edit signature dialog box. You can use formatting options, such as bold, italics, and underline, to make your signature look the way you want it to.
9. When you are finished, click on Save.
10. In the Signatures and Stationery dialog box, select the signature that you want to use and click on Set as Default.
11. Click on OK to close the Signatures and Stationery dialog box.
How to set up a signature on Outlook for Windows desktopOutlook for Windows Desktop is a powerful tool that can help you stay organized and productive. Here are the steps to set up a signature on Outlook for Windows desktop:
1. Open Outlook on your Windows desktop.
2. Click on the File tab in the top-left corner of the screen.
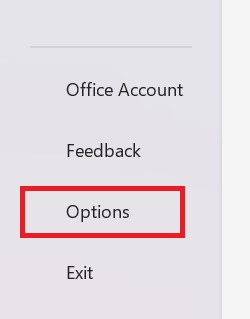
3. Click on Options in the left pane.
4. In the left pane, click on Mail in the Outlook Options dialog box.
5. Click on Signature, in the Mail Format section
6. Click on New Signature in the Signatures and Stationery dialog box.
7. Type the Name for your signature in the New Signature dialog box, and then click on OK.
8. In the Edit Signature dialog box, add your signature text. You may customise the design of your signature with formatting options like bold, italics, and underlining.
9. Click on OK when you have finished editing the signature.
10. You can set the signature as default by clicking on Set as Default in the Signatures and Stationery dialog box.
11. Click on OK to close the dialog box.
How to make a signature on Outlook for desktop (Mac)If you have a Macbook, then there is a slight difference in the steps to set up a signature on Outlook. Here are the steps on how to make a signature on Outlook for Mac Desktop:
1. Open Outlook on Mac.
2. From the Outlook menu, click on Preferences.
3. Click on Mail from the Preferences window.
4. Click on Signatures from the Mail window.
5. Click on the + button to add a new signature.
6. Enter a Name for the signature.
7. Type your signature in the Signature box.
8. You can format your signature by using the formatting options at the top of the window.
9. Click on Save when you're done.
10. Select the signature which you want to use from the New Messages and Replies and Forwards drop-down menus.
How to add a signature in the Outlook mobile appOutlook mobile app gives you accessibility to send mail from anywhere. You can add a signature on Outlook using the mobile app as well, Here are the steps on how to add a signature in the Outlook mobile app:
1. Open the Outlook app on your mobile device.
2. Tap the Profile icon in the top left corner of the screen.
3. Click Settings on the left-bottom of the screen.
4. Scroll down and click Signature.
5. Scroll down and click Signature.
6. Enter your signature text in the Signature text box.
7. You can also add images to the signature by clicking on the Signature Image button
8. Click on Save.
Your signature will now appear at the bottom of all new emails you send from your Outlook app.
How to edit a signature in OutlookIf you want to make changes in your signature like adding other details or editing the current signature, you can do it easily and it won’t take much time. Here are the steps on how to edit a signature in Outlook:
1. Open Outlook on your device.

2. Click on the File tab at the left pane of the screen.
3. Click on Options.
4. In the Outlook Options window, click on Mail in the left pane.
5. In the Mail section, click on Signatures.
6. In the Signatures and Stationery window, select the signature that you want to edit.
7. In the Edit signature box, make your changes to the signature.
8. When you're done, click on Save.
9. Click on OK to close the Signatures and Stationery window.
Your changes will be saved and will appear in all new emails that you send.
ConclusionYou can add signatures at the end of your mail in Outlook to let people know who has sent the mail and make it look more professional.It is always advised to keep your signature brief and to the point. It may include your name, title, company, company/brand logo and contact information. If you have multiple accounts for Outlook for your work, you can create multiple signatures and use them for different purposes.
ALSO READ: How to set out of office in outlook